Scroll To Top

3ds Max for Architectural Visualization (Interior &Exterior) Courses on 10 DVDs

₹3,031₹4,375

Product Sold Out

We will notify you when product is available

3ds Max for Architectural Visualization (Interior &Exterior) Courses on 10 DVDs

3ds Max for Architectural Visualization (Interior &Exterior) Courses  on 10 DVDs Buy 3ds Max for Architectural Visualization (Interior &Exterior) Courses on 10 DVDs at discounted prices with easy payment options Product Id : 82431165
₹3031 MRP:₹4,375 31% off

Inclusive of all taxes

Get this for as low as: ₹2,971 How to earn CluesBucks+

English हिंदी

  • 1) Create account & Earn 500 CB+ instantly (New User)
  • 2) Get 100% Cashback as CB+ on all orders*
  • 3) Complete any COD order to earn CB/ CB+
  • 4) Win CB/CB+ as part of our Promotions.
Original Price
Applicable for All Users
Apply cluesbucks+
Deal Price
₹3,031
(  ₹60 ) 
₹2,971

*All discounts can be availed in the cart page

Extra CluesBucks+only on VIP Club. Join Now
Sold Out

This product is currently out of stock

  • No Returns & Replacement

    If applicable customer can place a return/replacement request within 10 Days of order delivery.

    In case of damaged/missing/wrong product or empty parcel, the return/replacement request should be placed within 2 days of delivery.

    Know More
  • Payment Options: (Credit Card , Debit Card , Net Banking , Wallets , EMI , COD)
Sold by :

MULTIMEDIA STORE

THANJAVUR , Tamil Nadu

4.5 (5) Reviews
Visit Seller Store
Product Details:

3ds Max for Architectural Visualization (Interior &Exterior) Courses on 10 DVDs

Interior And Exterior

PRODUCT DESCRIPTION

LEARN CREATING AND RENDERING EXTERIOR VISUALIZATIONS IN 3DS MAX VIDEO TUTORIAL DVD 


DURATION: 7 HRS. 10 MIN.

REQUIRED SOFTWARE: 3DS MAX 2012, V-RAY 2.20.03, PHOTOSHOP CS5

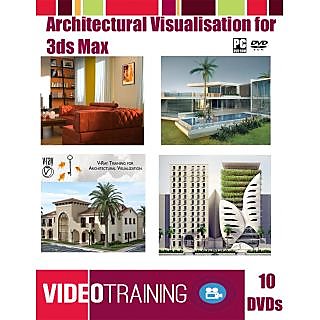
IN THIS 3DS MAX TUTORIAL WE WILL LEARN ABOUT CREATING INTERIOR VISUALIZATIONS FROM START TO FINISH. THROUGHOUT THESE LESSONS WE WILL FOCUS ON CREATING AN EXTERIOR VISUALIZATION. WE WILL GO THROUGH SEVERAL DIFFERENT STAGES INCLUDING MODELING AND PREPARING VEGITATION MODELS LIKE GRASS AND TREES SO WE CAN USE THEM IN OUR SCENE AS PROXY. WE ALSO GO THROUGH LIGHTING, TEXTURING AND POST-PRODUCTION WHEN YOU WILL LEARN COUPLE OF TECHNIQUES ABOUT HOW TO MAKE OUR RENDERS LOOKS BETTER AND MORE APPEALING.

 
01 - INTRODUCTION AND PROJECT OVERVIEW.FLV
02 - BUILDING MODELING PART 1.
 03 - BUILDING MODELING PART 2.
 04 - MODELING GRASS.
 05 - MAKING MATERIALS FOR GRASS.
 06 - DISTRIBUTING GRASS AROUND BUILDING.
 07 - MODELING TREE.
 08 - PREPARING MATERIALS FOR SCENE.
 09 - ADDING LIGHTS.
 10 - RENDER SETUP.
 11 - MAKING FINAL ADJUSTMENTS IN PHOTOSHOP.

RENDERING EXTERIORS IN 3DS MAX


INTRODUCTION 3M 52S

WELCOME 55S
WHAT YOU SHOULD KNOW BEFORE WATCHING THIS COURSE 24S
USING THE EXERCISE FILES 2M 33S

1. CREATING EXTERIOR MATERIALS 43M 37S

ASSESSING THE DESIGN POSSIBILITIES 4M 3S
FORMING PAINT COLORS AND SHEEN LEVELS 7M 15S
MAKING BRICK AND CONCRETE SPARKLE 4M 7S
ADDING SUBTLE DETAIL TO WOOD AND SIDING 8M 50S
POLISHING METALS 8M 13S
ADDING LUSTER TO GLASSES 4M 33S
CONVERTING FOLIAGE MATERIALS FOR MENTAL RAY 6M 36S

2. RENDERING IN DAYLIGHT 25M 9S

CREATING THE DAYLIGHT SYSTEM AND POSITIONING THE SUN 4M 23S
SOFTENING THE SUN AND SHADOWS 4M 46S
ADJUSTING THE PHOTOGRAPHIC EXPOSURE FOR STYLIZED IMAGERY 5M 56S
LIGHTING USING HDR IMAGERY IN THE DAYLIGHT SYSTEM 5M 48S
ADDING EXTRA LIGHTS FOR GLOSSY SURFACES 4M 16S

3. LIGHTING NIGHT AND DUSK SHOTS 26M 30S

USING THE DAYLIGHT SYSTEM FOR SUNSETS 3M 18S
CASTING LIGHT FROM EXTERIOR FIXTURES 8M 13S
LIGHTING INTERIOR SPACES FOR NIGHT 7M 14S
ADJUSTING LUMINOUS AND LIT SURFACES 4M 7S
FINE-TUNING THE PHOTOGRAPHIC EXPOSURE 3M 38S

4. ADJUSTING RENDERING SETTINGS 20M 35S

RENDERING AND OPTIMIZING RENDERING 4M 49S
FINE-TUNING FINAL GATHER FOR SPEED 4M 49S
PUSHING GLOBAL ILLUMINATION VALUES FOR VISUAL IMPACT 4M 47S
STYLIZING THE BOUNCED LIGHTING 6M 10S

5. LIGHTING AND RENDERING ADDITIONAL PASSES FOR COMPOSITING 32M 24S

CREATING AN AMBIENT-OCCLUSION OVERRIDE MATERIAL 5M 56S
CREATING AN AMBIENT-OCCLUSION RENDERING PASS WITH CUSTOM MATERIALS 8M 33S
LIGHTING A CUSTOM SPECULAR PASS FOR SPARKLE 7M 15S
SETTING UP CUSTOM MASKS FOR COMPOSITING FLEXIBILITY 6M 51S
RENDERING THE IMAGE PASSES 3M 49S

6. COMPOSITING AND POST EFFECTS IN NUKE 39M 12S

IMPORTING THE IMAGERY AND ARRANGING THE LAYERS 3M 28S
SETTING BLENDING MODES AND ADJUSTING OPACITY 3M 13S
FINE-TUNING COLOR USING RENDERED MASKS 5M 57S
ADDING DEPTH OF FIELD 6M 47S
PUTTING ON THE FINAL POLISH WITH GLINTING HIGHLIGHTS AND GLOW 5M 1S
ADDING QUICK CLOUDS AND SKY 10M 14S
RENDERING THE COMPOSITED IMAGES 4M 32S

7. COMPOSITING AND POST EFFECTS IN AFTER EFFECTS 31M 25S

IMPORTING THE IMAGERY AND ARRANGING THE LAYERS 2M 49S
SETTING BLENDING MODES AND ADJUSTING OPACITY 3M 28S
FINE-TUNING COLOR USING RENDERED MASKS 5M 47S
ADDING DEPTH OF FIELD 5M 19S
PUTTING ON THE FINAL POLISH WITH GLINTING HIGHLIGHTS AND GLOW 3M 56S
ADDING QUICK CLOUDS AND SKY 6M 9S
RENDERING THE COMPOSITED ANIMATION 3M 15S
RENDERED MOVIES 42S
CONCLUSION 42S
NEXT STEPS 42S

LEARN ADVANCED OPTIMIZED ARCHITECTURAL VISUALIZATION IN 3DS MAX AND V-RAY 


3ds Max 2012, V-Ray | 
Duration : 5h 48m | Project Files Included

Level : Advanced Level


Lessons in this tutorial     


  • 1 Introduction and project01:13
  • 2 Site texturing10:09
  • 3 Creating the site reflection textureFree with Demo11:08
  • 4 Importing images into AutoCAD 07:06
  • 5 Drafting contours and buildings in AutoCAD09:08
  • 6 Importing AutoCAD files to 3ds Max07:16
  • 7 Terrain creation12:10
  • 8 Terrain mesh division and site textures09:02
  • 9 Greeble city creation04:57
  • 10 Extracting textures for the facade of the city08:17
  • 11 Texturing the city model07:03
  • 12 Preparing Architectural AutoCAD plans08:03
  • 13 Importing AutoCAD plans into 3ds Max07:32
  • 14 Updating linked plans04:32
  • 15 Modeling organic outlines using splines13:18
  • 16 Extruding splines07:04
  • 17 Modeling the tower facades11:06
  • 18 Modeling slabs and balustrades11:07
  • 19 Creating more slabs, balustrades, and columns08:48
  • 20 Modeling columns and lift cores04:19
  • 21 Organic modeling of the stadium support11:37
  • 22 Modeling the stadium seating10:53
  • 23 Editing the seating model08:07
  • 24 Editing the tower and seating connection06:00
  • 25 Organic modeling of the stadium shell10:48
  • 26 Editing the top roof slab10:37
  • 27 Modifying floor slabs and adding stadium details12:21
  • 28 Editing ground terrain for grass and plants11:05
  • 29 Creating proxy and billboard plants09:07
  • 30 Scattering plants and importing proxies into the model10:49
  • 31 Modeling pavilions using nurms09:54
  • 32 Texturing the glass facade10:59
  • 33 Texturing the building interiors11:19
  • 34 Texturing the balustrades08:26
  • 35 Summing up the texturing09:19
  • 36 Render settings for draft views13:06
  • 37 Getting the final image11:47
  • 38 Photoshop workflow and conclusion09:27

LEARN CREATING FIVE ARCHITECTURE FACADES IN 3DS MAX AND V-RAY VIDEO TRAINING DVD 


Duration : 5h 52m

Video Lessons : 40
Project Files : Included

Lessons in this tutorial  

   
1 Introduction and project overview 01:27

2 Importing CAD design plans and content overview 07:24


3 Rotating CAD plans and starting the context model 05:58


4 Modeling the sidewalks and plantersFree with Demo 09:59


5 Modeling the road markings and entrance steps 10:51


6 Modeling the base geometry of the first facade 09:40


7 Editing the base geometry for the square and round windows 09:07


8 Modeling the profiled banding and decorative columns 11:13


9 Modeling the windows 10:49


10 Editing the facade with window openings and side walls10:21


11 Using XRef scenes and introduction to the second facade 04:56


12 Starting the modeling of slabs and outer walls for the second facade 05:56


13 Modeling the front face of the off-shutter concrete wall for the second facade 09:59


14 Modeling the back face and side edge of the off-shutter concrete wall 06:46


15 Modeling detailed glass balustrades and shutters 11:15


16 Different methods for modeling shutters 05:25


17 Modeling the shutter rails from existing geometry 06:42


18 Animating the shutters 05:44


19 Modeling the glazing using one object 09:46


20 Modeling the roof slab and editing the existing facade parts 11:24


21 In-depth introduction to the third facade 04:40


22 Using import, merge and modeling the organic walls of the third facade 10:04


23 Adding openings and detail to the organic walls of the third facade 10:38


24 Modifying the smooth and sharp edges of the organic walls 11:15


25 Modeling extensions and connections to the organic walls 11:46


26 Editing the floor slabs to include planters on the third facade 11:46


27 Editing the balustrades and slabs on the third facade 06:21


28 Modeling and growing ivy plants in real time off the slab edges 08:57


29 Modeling a low poly ivy plant using a textured edit poly 06:57


30 Creating a proxy of the ivy plant 09:23


31 Learning when to use a proxy and how to save out to separate files 05:04


32 Texturing the first facade using optimized V-Ray materials and UVW map 11:09


33 Shortcuts to texturing the second facade 07:13


34 Editing textures and tips for texturing grouped objects 08:17


35 Texturing the context and adding more proxy plants 08:45


36 Using XRef scenes and initial camera and lighting settings 11:05


37 Setting up render settings and first test renders 09:16


38 Managing reflections with precision using textured objects 08:43


39 Environment and background settings in V-Ray 12:33


40 Post-production in Photoshop using custom backgrounds and overlays 14:17


Project files Included

CREATING IMPRESSIVE ARCHITECTURAL EXTERIORS VISUALIZATION IN 3DS MAX AND V-RAY


Duration : 8h 11m
Project Files Included
Video Lessons : 50

Video Lessons:

1 Introduction and project overview 01:42
2 Reading our 2D CAD plans 06:13
3 Extracting information from our CAD plans 05:43
4 Refining blocks and text for export 04:54
5 Preparing contours in AutoCAD 09:32
6 Relayering plans for final export 11:47
7 Setting up 3ds Max for modeling 04:18
8 Importing CAD plans into 3ds Max 11:16
9 Modeling the raw terrain 09:46
10 Creating a refined terrain model 05:50

11 Adding roads to the terrain model 09:55
12 Editing the terrain model mesh 11:32
13 Methods for modeling the house walls 11:37
14 Editing walls and modeling columns  11:50
15 Modeling the ground floor slab 12:05
16 Creating the steps and slab edges 11:07
17 Producing the garage doors  08:15
18 Designing the fixed windows  10:35
19 Modeling the entrance window 08:57
20 Executing the main sliding doors 11:21

21 Generating the front double door 07:37
22 Modeling the vertical screens 09:14
23 Refinements to the ground floor walls 10:35
24 Creating the upper floor slab  10:53
25 Designing custom spiral stairs 10:58
26 Using shortcuts and existing geometry 10:06
27 Modeling the final walls 09:57
28 Forming the roof slab 09:51
29 Customizing the terrace 12:04
30 Modeling the pool and water 09:11

31 Sculpting running water 09:47
32 Refining the hardscape and pool 10:59
33 Transforming the slab edges and roof 11:50
34 Refining the terrain model 10:26
35 Setting our V-Ray rendering properties 10:16
36 Creating a white architectural render   08:19
37 Setting up our environment and HDRI 12:10
38 Controlling reflections and HDRI direction 11:55
39 Creating a custom site texture 11:51
40 Saving and mapping the site texture 11:33

41 Adding textures to the building 11:40
42 Using multi/sub-object materials 12:11
43 Adding multi materials 06:01
44 Texturing the falling water 11:41
45 Animating the sliding and pivot doors 07:45
46 Adding vegetation into the scene11:09
47 Adjusting the camera 11:18
48 Final render settings  12:06
49 Editing our render in Photoshop 10:31
50 Final image and course conclusion 09:03


======================================================================

 This DVDs are only suitable for a PC/laptop/Mac; it WILL NOT play on a TV 

 =======================================================================

LEARN V-RAY FOR ARCHITECTURAL VISUALIZATION ON 3DS MAX VIDEO TUTORIAL DVD 


Duration : 8:06:00 H:MM


MODULE 1: The Critical Settings - Part I  
41 min  video Lesson

This module focuses on two of the Most Critical and Fundamental features That Should BE addressed DURING the course of Any visualization project WHERE V-Ray is USED - the Irradiance Map and Image Sampler. The irradiance map is arguably the most widely used primary bounce GI solution among V-Ray users and this module breaks down this complex feature in simple and easy to follow instruction. Highly detailed illustrations provide the viewer a clear understanding of how these solutions work. The module continues by explaining the critically important concept of image sampling and antialiasing. Virtually every 3D scene is victim to the side effects of these two features but this module explains how the three image samplers work and how the various filters can be used to control the often problematic effects of antialiasing. After completing this section, viewers will have the tools necessary to minimize these effects and maximize the detail in the rendered output. 

MODULE 2: The Critical Settings - Part II 
57 min video Lesson

In this Second module on Critical settings, viewers are Presented two more critically important GI solutions - the Light Cache and Quasi Monte Carlo GI. These two solutions offer unique qualities to our work and present challenges for proper use. During the course of instruction, viewers are given detailed explanations of how these solutions work, what they can do, and how to best implement them. Emphasis on these solutions is geared towards efficiency and showing the viewer how to achieve a great mixture of speed and quality. Before the module ends, a detailed explanation of color mapping and environment lighting is provided, which are two additional critical features that have a global impact on the lighting in any scene. By the end of module 2, viewers will possess a strong foundation of the most critical V-Ray settings on which further material can be effectively grasped and easily understood. 


MODULE 3: V-Ray Materials 
34 min  video Lesson

Thanks to the Power of V-Ray and the Material Editor, we can realistically simulate any material on earth by controlling all the visual properties a material possesses. Creating stunning visualizations is usually not possible or practical without a solid understanding of these numerous properties. Building on the user's fundamental understanding of material channels, basic map types and UVW mapping, this module delves into the settings that bring materials to life in stunning fashion. While materials have a tremendous impact on the visual aesthetics of a scene, they have an equally great impact on rendering times. In this lesson, users will learn how to get the most out of blurry material effects and other great material characteristics such as refractions without bringing their computers to a grinding halt. Free sources for great material libraries are presented giving users access to virtually any material type imaginable. 


MODULE 4: Animating Static Scenes 
36 min  video Lesson

Animations something Unique Offer That stills Simply CAN not Provide - A True sense of being immersed Within A scene. While an animation can give you much more, the final product comes at a hefty price - rendering time and scene detail. Touching up a single still image is relatively easy but animations are much less forgiving of a lack of quality. This module covers the steps necessary to create animations of static scenes while maximizing quality and minimizing render times. Users will learn effective short cut methods to creating animations with certain types of moving objects, without degrading effects to the overall GI solution. The discussion continues with methods of eliminating the unwanted effects of varying GI flickering which plagues many animations. 


MODULE 5: Image Based Lighting (HDRI) 
37 min  video Lesson

HDRIs Offer A Unique way to Light A scene with A Look That is Difficult to achieve with other standard lighting approaches. This module shows how to unlock the power of the HDRI to achieve dramatic looks and inspiring . Users will learn the differences between the various types of image based lighting and when to use each. Examples are presented to show how HDRIs can be used effectively while acting as the sole source of illumination in a scene. Critical differences in dynamic ranges between exterior and interior scenes are discussed as well as the resulting effect on how HDRIs should be used in each instance. 


MODULE 6: Lights 
38 min video Lesson

If you Ask Any Veteran 3D User what the Most Important element of a good 3D scene is, you'll always get the same answer - lighting. Good lighting can make a scene with bad modeling or materials look good. Likewise, poor lighting can make a scene with good modeling and materials look bad. This module shows the user how all three major light types, standard, photometric, and V-Ray lights, can be used to achieve different results and different render times. Different methods for setting up exterior and interior lighting are discussed as well as methods for creating nighttime scenes. The module continues with in depth coverage of V-Ray shadows and how to manipulate their appearance. Finally, the new VRaySun and VRaySky features are explained in detail. 


MODULE 7: Advanced Features Part I 
31 min  video Lesson

In Part I of this two Part series, we Look at some of the many great features Additional That make V-Ray stand out from other rendering engines. Here the viewer is shown how to effectively use the new VRay Physical Camera to simulate the qualities of a real-world camera. Progressive path tracing is introduced as another way to render without having to worry about all the quality settings that must be considered with other rendering methods. Finally, an in-depth look at all the great features of the V-Ray Frame Buffer is provided, and the user is shown why this option should always be used over the standard 3ds Max frame buffer. 


MODULE 8 : Advanced Features Part II 
46 min video Lesson

In Part II of this series, we Look at some great features Additional That have not yet Been Discussed, Including caustics, displacement, and the VRayBlend VRayOverride materials, and VRayFur. The module continues with a detailed discussion on techniques and features designed to improve resource management, such as the VRay Proxy and dynamic memory, as well as how to properly assemble a scene while retaining the best mixture of rendering speed vs. memory consumption. The user will learn when to collapse objects, when to keep object modifiers and compound objects in tact as well as numerous other considerations that have a great impact on how V-Ray is used. 


MODULE 9: Practical Exterior Lighting (Bonus Module) 
78 min video Lesson

Having Covered the VAST Majority of the V-Ray Important features and settings in modules 1 through 8, students are shown how to apply many of things discussed in earlier modules, to a real exterior scene created by 3DAS. In this module, students are shown numerous different lighting and rendering approaches including irradiance maps, light cache, QMC, HDRIs, progressive path tracing, the V-Ray physical camera and the VRay Sun. The instructor describes the process that he would go through to light and render this scene from scratch, and then describes some of the other ways that you might want to approach your scenes based on what the final deliverable, the time you have available, and problems that you might encounter along the way. Throughout the module, students are shown how to deal with the myriad of problems that may arise in any scene, such as splotches, noise, flickering GI, strange dots, running out of memory, excessive render times, system crashes, lack of detail and so on. The goal of this module is to teach students how to achieve the highest quality renderings in the shortest amount of rendering time. 


MODULE 10: Practical Interior Lighting (Bonus Module) 
90 min video Lesson

In this module, the viewer is Shown how to light an interior scene from start to finish. The instructor demonstrates several different ways to approach interior lighting, covers most of the different light source types commonly used for interior lighting, and then puts numerous different render and material settings to the test to show how you can get different looks to your images and precisely control the relationship between speed and quality. This video provides a solid review of material from all previous modules and serves as an invaluable guide to the complex subject of interior lighting. 
======================================================================

 This DVDs are only suitable for a PC/laptop/Mac; it WILL NOT play on a TV 

 =======================================================================


CREATING FURNISHING & RENDERING THE APARTMENT IN 3DS MAX VIDEO TRAINING DVD


Author : Kris Lee 
Duration : 27 hours


PART -1

Topics

Working from DWG Files
Working in 3ds Max with Accurate Measurements
Architectural Modeling
Precision Modeling
Architectural Vizualisation

01 - Introduction.mkv 
02 - Wall.mkv 
03 - Floor.mkv 
04 - Windows.mkv 
05 - Door Part 1.mkv 
06 - Door Part 2.mkv 
07 - Door Part 3.mkv 
08 - Door Part 4.mkv 
09 - Patio Door.mkv 
10 - Trimwork.mkv 
11 - Cabinets.mkv 
12 - Electric Outlet.mkv 
13 - Lightswitch.mkv 
14 - Double Lightswitch.mkv 
15 - Merging Outlets.mkv 
16 - Thermostat.mkv 
17 - Merging the Thermostat.mkv

01 - Intro.mkv 
02 - Bedframe.mkv 
03 - Mattress & Headrest.mkv 
04 - Bedsheet & Pillows .mkv 
05 - Dressers.mkv 
06 - Lamps.mkv 
07 - Merge Bedroom.mkv

01 - Vanity.mkv 
02 - MedicineCabinet.mkv 
03 - Faucet 1.mkv 
04 - Faucet 2.mkv 
05 - Toilet 1.mkv 
06 - Toilet 2 .mkv 
07 - Toilet 3.mkv 
08 - ShowerArea 1.mkv 
09 - ShowerArea 2.mkv 
10 - VanityLight.mkv

01 - Intro.mkv 
02 - Table.mkv 
03 - Chairs.mkv 
04 - wineGlasses.mkv 
05 - Candles.mkv 
06 - Plant.mkv 
07 - mergeSet.mkv

PART-2

Working with the apartment created in part 1.
Creating Hard Furnishings
Creating Soft Furnishings
Cloth Simulation
Accurate Measurements
Placement of Props
Practical Placement of Furniture in order to ideally represent the work to the client

PART -3

Preperation of Textures
Texturing Floors
Texturing Walls
Texturing Furniture
Texturing Appliances
Lighting Architectural Scenes
Rendering in Mental Ray
Compositing in Photoshop


======================================================================

 This DVDs are only suitable for a PC/laptop/Mac; it WILL NOT play on a TV 

 =======================================================================

LEARN MODELING INTERIORS IN 3DS MAX VIDEO TRAINING DVD 


Duration : 6 hours


41 Video Lessons


Project Files :  Included


1 Project Overview  00:43


2 Building the walls of the room  07:49


3 Adding windowsFree with Demo10:05


4 Building the front door  05:37


5 Creating the vaulted ceiling  04:59


6 Adding the floor and ceiling05:09


7 Adding trim along the ceiling and floor 05:33


8 Building the stairway 07:21


9 Cutting out the elevated doorway 06:49


10 Adding a television to the front wall 05:20


11 Starting the large shelf along the front 06:53


12 Finishing the shelf 08:23


13 Creating and positioning recessed lighting 05:34


14 Building the window coverings 14:41


15 Finishing the window coverings 04:44


16 Starting on the sofa 11:06


17 Refining the sofa 13:27


18 Finishing the sofa 11:55


19 Adding legs to the sofa 06:37


20 Modeling the coffee table 09:30


21 Completing the coffee table 04:38


22 Starting the fireplace 08:32


23 Refining the fireplace 07:17


24 Finishing the fireplace 09:39


25 Beginning the chair model 07:06


26 Refining the chairs05:02


27 Completing the chairs 11:54


28 Adding pillows to the chairs and sofa 08:31


29 Building the wall art and shelves with splines 10:58


30 Adding small plants near the steps 08:37


31 Building the large plant 08:38 


32 Creating wall art using Section splines 05:28


33 Building the mesh sculpture 07:20


34 Modeling the AV component 09:29


35 Building the overhead light fixture 07:49


36 Modeling the track lighting 13:37


37 Modeling the floor lamp 11:13


38 Adding the handrail 04:19


39 Adding a knob to the door 04:14


40 Building the picture frames 05:15


41 Adding area rugs 09:39


Project files Included

LEARN RENDERING INTERIORS IN 3DS MAX AND MAXWELL RENDER VIDEO TRAINING DVD 


Duration : 1h 45m


Project Files Included


This tutorial is designed to help you quickly get a good solid foundation of lighting and rendering techniques used for interior visualization. 


Over the period of the tutorial, we are going to explore quick ways to achieve a believable render of an interior, discuss the importance of light source placement as well as additional techniques to speedup the Maxwell rendering and prevent noise generation which is a common problem with unbiased renders. We will look at the process of setting up the lighting for the day time scene, and then shift our parameters to create a night effects.


By the end of the training, you should be able to generate a fast lighting solution which you can later tweak to achieve the effect and  that you or your client wants


Contents:


1 Introduction and project overview 00:46


2 Exploring the project files 03:59

 3 Main light source 12:12


 4 Reviewing sun emitter and creating fill light 10:12


 5 Adding an additional light source 13:03


 6 Multilight features and workflow 17:52


 7 Post-processing the daytime scene 11:55


 8 Setting up the night scene 09:31


 9 Turning on the light fixtures 14:08


 10 Finalizing the night scene 11:22


And
Project Files 86 Files, 9 Folders - (1.33 GB) 


======================================================================

 This DVDs are only suitable for a PC/laptop/Mac; it WILL NOT play on a TV 

 =======================================================================

LEARN CREATING HIGH RESOLUTION STUDIO RENDERS IN 3DS MAX AND V-RAY VIDEO TUTORIAL 


Duration : 2h 18m


Project Files Included


Lessons in this tutorial     

  • 1 Introduction and project overview  01:11

  • 2 Addressing model requirements 04:27

  • 3 Setting up the studio environment 02:21

  • 4 Constructing the initial lighting 06:06

  • 5 Implementing the real time lighting workflow 04:19

  • 6 Exploring HDR Light Studio 04:58

  • 7 Applying the main lighting 10:53

  • 8 Moving the HDRI lighting 02:44

  • 9 Preparing V-Ray for shader development 04:23

  • 10 Texture map requirements 04:27

  • 11 Generating shaders for the frame 08:10

  • 12 Forming shaders for the wheels 10:46

  • 13 Designing shaders for the crank and pedals 13:27

  • 14 Applying shaders on the gears 10:57

  • 15 Creating shaders for the brakes and chain 09:24

  • 16 Customizing shaders for the saddle  and handlebars 08:29

  • 17 Finalizing the scene 05:14

  • 18 Setting up V-Ray for final rendering 11:34

  • 19 Using Backburner 02:24

  • 20 Retouching in Photoshop 12:20

Project files Included

V-RAY 2.0 FOR 3DS MAXL VIDEO TRAINING TUTORIAL DVD 


 Duration : 05h 11m


 Language: English 

Duration : 05h 11m
Language: English 
DESCRIPTION:

1. Getting Ready to Render with V-Ray22m 0s
Installing V-Ray
Setting up V-Ray
Locating V-Ray's tools and features
V-Ray's image-saving options
2. Critical V-Ray Concepts25m 52s
Image sampling explained
Understanding subdivs
Using the DMC Sampler
Overview of color mapping
Understanding the color-mapping modes
3. Key Lighting Tools33m 25s
Introduction to lighting in V-Ray
Dealing with lighting problems
Adding a spherical fill light
Creating a mesh light
Creating a skylight effect
Working with the dome light
4. Global Illumination44m 32s
Global illumination (GI) explained
Understanding primary and secondary bounces
How irradiance mapping works
Using irradiance mapping, part 1
Using irradiance mapping, part 2
How light cache works
Using light cache
Understanding brute force GI
Using brute force GI
5. The V-Ray Materials38m 52s
Introduction to V-Ray-specific materials
Creating a diffuse color
Making reflective materials
Blurring reflections
Making clear and colored glass
Creating a translucency effect
6. Quality Control with Image Sampling25m 11s
Introduction to image sampling
Using the Fixed-Rate sampler
How to use the Adaptive DMC sampler
Working with the Adaptive Subdivision sampler
Comparing image-sampling renders

7. The Physical Workflow21m 4s
The physical workflow explained
Working with VRaySun and VRaySky
Controlling the VRayPhysicalCamera
8. V-Ray's Effects Tools46m 5s
Depth of field: VRayPhysicalCamera
Depth of field: using a perspective viewport
Creating a motion blur effect
Generating caustic effects
Using VRayFur
Stereoscopic 3D rendering

9. Using Render Elements33m 58s
Render elements workflow
Preparing to composite
Compositing V-Ray elements
Putting extra elements to work
Post-lighting a scene
10. V-Ray RT14m 0s
Overview of V-Ray RT
Demonstrating the RT workflow
======================================================================

This DVDs are only suitable for a PC/laptop/Mac; it WILL NOT play on a TV 
======================================================================
Term

Shipping Banner

Educational CD Specificaton

Ideal Course :   Engineering

Media Specifications

Author(s) :   
Subject :   Architecture

More Details

Maximum Retail Price (inclusive of all taxes) Rs.4375
Common or Generic Name -
Net Contents / Net Quantity -
Manufacturer's Name and Address -
Packer's Name and Address -
Marketer's name and Address -
Importer's Name and Address -
Country of Origin / Manufacture / Assembly India

Rating & Reviews

0
5
0
4
0
3
0
2
0
1
0

0 Ratings, 0 Reviews

Please Note: Seller assumes all responsibility for the products listed and sold . If you want to report an intellectual property right violation of this product, please click here.
Some text some message..